Life in the Crawl Space

Its Been a Long Haul…

me after a day in the crawl space

but after many days in the crawl space, I have most of the heating ducts in place. I’m not sure what the inspector wants to see so I haven’t taped the ducts or wrapped them with insulation yet.

I’m happy with the heat distribution. I can feel a good force of air at all of the heat registers. Now if I just had some insulation on my second story I would probably have a nice warm house. Its been pretty cold for this area and I definitely don’t want to waste too much energy trying to keep the house warm. I do warm it up for short periods of time though.

You may remember the plan here.

The design changed a bit due to engineering, realities of the space and fittings available.


There is a reason they call it a “crawl space”

I bring the crawl space inside with me

I’m not a big fan of going into my crawl space for all the electrical and duct work that I’ve been doing. I usually end up bringing some of the crawl space back inside with me. I know people must do this kind of thing for a living but I can’t wait until its all over. I still have to run new plumbing for my second story bathroom which means I will be going back.

For now I’m resting on my laurels a bit and enjoying some forced air heat on these chilly mornings.


The Fun Part

You know that I am much more interested in the superficial pursuit of interesting design. I’ve spent many hours on the internet looking at all the options for heating registers. The final frosting on the top of a more practical infrastructure. It is kind of amazing how many websites there are out there that specialize in heating registers.


Just a Couple

Here are just two examples of what I have been looking at. These two are specifically for floor applications. Obviously if it sits on the floor it needs to be sturdy enough t0 step on. Its not very easy to judge the quality or durability through a website. Price is not always a good indicator. These are both metal.

I look at the shipping weight too and that can help to determine how sturdy it might be. One that I found online is actually at a local store so I’ll take a look at it in real life.

Drop me an email or comment here if you want any additional information such as  the links for any of the websites that I’ve been looking at recently.

Status Report, September 2012

Where things are :

In the past people have asked me to clarify the locations of things so I hope that this illustration helps to show where things are on the second floor. This is also an opportunity to give a status update.

Layout of the new upstairs

  • The deck and the terrace are both going to have tile on them. The deck area tile is done but the railing around the deck needs to be finished. I posted a process picture of the tile deck on facebook  here.  The basic railing design I posted earlier on this blog here.  I am still tweaking the design a bit so it is slightly different than the illustration. There are different designs for varying transparency in different places. At the end of the deck  2 of the railing sections will be glass.
  • The arbor I made already and is ready for install when I am sure that it won’t get in the way of any other installation.
  • The stairs are in process. The metal frame is in place but I still need to level everything and make the final connections to the building. There will be plenty of work to do here. The engineer specified a beam under the floor where the stairs hit the lower level. The treds are wood and need to be cut and attached, then metal verticals are attached to each tred and those are topped with a solid wood handrail.
  • The bathroom and closet walls in the new bedroom have not been built yet. The entire bathroom has not been started yet. I want to wait until I get the new bathtub before I commit to exact placement of the bathroom wall.

I hope this helps to show where things are in relation to each other.

Details….details….

I’m working on a lot of different things at the same time. I’m figuring out how to do many of the things that I was unsure of; but then, it seems I often have to move on to something else due to the order that things need to get done. For instance, I figured out the railings for my decks but now I have to wait until I finish the tile. The railing was going to be in the way. I couldn’t run the large duct under the floor until I had the structural beam in place for the new stairway. Still working on that but the stairs are roughly in position.

Let there be heat

verb2 ducting

This is commitment !

I actually committed to the placement of the ducts. I’ve put large holes in the wall and the floor. All of the final ducting is not in yet but I am testing the furnace for heating and it is amazing what a difference a bit of heat makes to the comfort inside the house.  I’d say that “heat” makes a home more than anything else that I have experienced so far. This hole takes the duct underneath my house to be directed to separate spaces.


Big holes for big ducts


This hole goes from my garage into the living space and I had to consult with the engineer to see how big of a hole would be allowed to pierce through the structural shear wall. I had to reframe some of the wall around the hole. The 4×4 stair support is also right next to the opening. I don’t know if all houses are like this but a lot of stuff has to be coordinated together in a tight space.

See the heating layout concept here.

Railings for the decks

Railings are just getting started

I’m really excited for the new exterior spaces that I have created. I have designed the railing panels so that there are places where the sun can come through and there are also places that provide complete privacy. I hope to spend a lot of time on the deck shown in this picture. The other deck (or terrace) is on the left here. The terrace is mostly a place for plants and a bit of outdoor space right outside of my new bedroom.

Railing design

working out the details

I started watching the sun set over my new deck over the last several months. During certain months the sun will be coming right onto my deck and into my new living room. I wanted to take advantage of that. I didn’t, however, want to see or be seen by my neighbors. I developed an angle that I hope will allow for me to look out toward the ocean but will block my view to the neighbor’s house. Different sections of the railing will have different designs. Some designed for letting light through and others to block visibility as much as possible. I learned a lot from the first fence that I built for the ground level. I learned to base everything on stock lumber that I can easily get nearby. Look at fence design on verb2. The railing should relate to the fence below but the requirements are a little different.  Here is a rendering of the railing concept :

A rendering of my concept

A big step for mankind

Stair metal fabrication just arrived

I designed the new staircase to be similar to those old exterior stairs you see on ’70s and ’60s style apartment buildings. The exterior ones have concrete steps. I am going to use a wood construction material for the steps but I borrowed the idea of a single big steel center support.

I worked with a local steel fabricator that helped me to refine the details of construction. I like working with people that are able to have a conversation about process and design. He was very good at making suggestions and also still listening to my crazy ideas.

A little help…

It helps to have strong friends

The finished steel structure was pretty heavy. My friend told me that I had to post a picture of other people helping me because I give the impression that I do everything by myself. There was definitely no way that I could never get this structure in place by myself and it helps that my friends are tall and strong.


From the Practical to the Fanciful

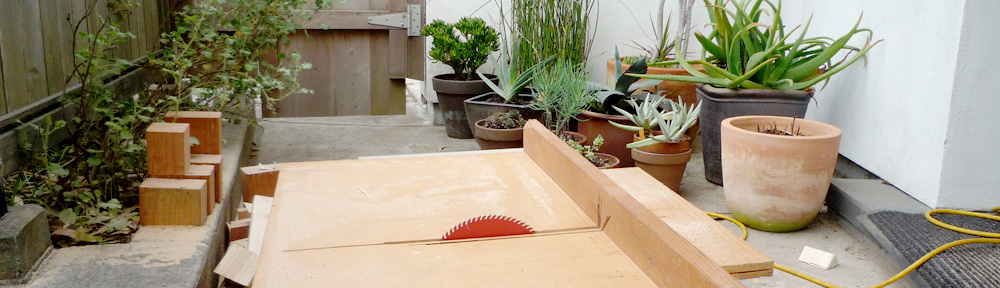
I’ve been dealing with a smorgasbord of engineering and design issues. The seismic retrofit is done and inspected except for the final application of plywood sheets to solidify the newly reinforced wall areas. With help from my brother (an engineer) and a local sheet metal shop I laid out the basics of my new central heating system and, at the same time, I’ve been looking at some of the available products to personalize my new home.

The Practical

With help from my brother, I laid out a schematic diagram of what I want to do with the central heating system. My house never had central heating before but I believe this system will help to keep the humidity under control and dry out the furthest corners of my house. I’m concerned about keeping my house dry in this humid, coastal environment.

Three dimensional CAD drawing of furnace layout

From this basic concept I worked with the sheet metal fabricator to come up with the system approach. The average person could have all of this design and installation done by a professional but I can’t afford the thousands of dollars that it would cost right now and I’m very motivated to get some heat in my house. Once I get all of the custom pieces made, I can use stock ductwork to make the runs and connections. Its fairly simple and inexpensive once the basics are in place.

Fanciful is more Fun

Of course I don’t mean “fancy.” You know I prefer a clean and simple design but the search for good design is definitely a “fanciful” pursuit. Good design is almost always more expensive and harder to find. The money I save and the extra time that I spend doing the final construction myself allows me the luxury of searching out products that I really love. I can take my time deciding what bathtub I want because I am the one that has to install it as well as pay for it.

I decided that I needed a couple of ceiling fans to maintain good air circulation away from my new peaked ceilings. There are many different fans available and the one you pick is definitely a big part of your design approach. Hopefully a ceiling fan won’t be changed very often and therefore is a more permanent part of your interior space.

Ron Rezek ceiling fanRon Rezek ceiling fanI looked around locally and couldn’t find anything that was simple and of small scale so I switched to an internet search and found a good variety of products at ylighting.com. There I found a couple of simple fans that had the option of shorter fan blades. Coincidentally I’m familiar with this particular designer, Ron Rezek’s, work as well. I’ve seen and appreciated many of his simple light fixture designs. I have no connection to ylighting but I found their website easy to use and their prices comparable to or lower than other sites. I like ordering from people that make my search easier and maybe even enjoyable.

Entrance stairwell under construction, beginning of shear wall plywood

A space begging for a centerpiece

While I’m working on the plywood shear wall nailing, I can’t help but think about what my new entrance space is going to look like when it is finally finished. I have very intentionally created a larger scale entrance into my new home. I wanted to make the stairwell a feature rather than just a necessity.

My plan here is to have some sort of hanging light fixture. I am not sure yet how big it needs to be in order to look right with the scale of the space. I’m going to have to mock something up in order to figure that out.

Pendant lighting research begins

I know that it has to fit within my general concept of style for this house but I am not sure yet just how big it has to be. I’ve been looking at websites again, from Ikea to Crate & Barrel to ylighting and I’ve seen a great variety of fixtures and a huge variation in price. Some of the large fixtures can cost up to $4,000. The Ikea light that I am looking at is made out of paper and is very cheap but I’m not sure it is big enough and maybe not even durable enough. If I can’t find the right fixture I’m thinking about making it myself. As you can imagine this fixture will have a big effect on the feel of the place.

Crate & Barrel Finley Pendant

IKEA pendent made of paper requires assembly

Available in many different sizes but the price goes up accordingly

22" dia. for $700, not much bang for the buck


The Crate & Barrel fixture is 28″ in diameter and is only $200 but I’m not sure if thats going to be big enough. I think I am leaning toward something really simple and therefore may end up making it myself. The simple circles don’t look that hard to make do they? Experience tells me however, if I can find something that I like and can afford, then buy it.


Both Practical and Beautiful?

Morso small wood stove

Satisfying my needs for beautiful function are these next two items on my wish list. I am definitely buying this wood stove when I can fit it into my finances. I looked at a lot of different stoves and when I saw this one in person, I was sold. It has the solidity and weight of an old fashioned stove and the size and simplicity to fit into my small space. It’s worth the wait to get the right thing.

Duravit shower / bath

This is the tub that I’m thinking about but can’t afford to buy yet. I’m really intrigued with the design concept that allows for a larger showering space and also a nice place to soak a while. It isn’t the cheapest design but I think it will be great to use and also look really nice in my new bathroom. It looks a bit like the plan of my house.

As always, just comment here or drop me an email if you want to know any more about anything here. I want to be helpful and keep things interesting. I’m not advertising anything here, I’m just trying to share my interest in good, useful and beautiful design.

November 2011 Update

I have been spending a lot of time underneath my house

foundation plates attach the foundation to the sill plate

There is a bunch of new metal holding my house together. Drilling concrete and inserting epoxy seems second nature to me now. Of course, now that I know what I’m doing, I’m done with the seismic retrofit part of the project.

Simpson hold down holds the stud framing to the foundation


I mentioned these brackets in an earlier post. I bought them a long time ago and have been asking questions of my engineer and my contractor ever since. One thing that wasn’t readily obvious was that the hold downs are actually raised up away from the sill.

You call this sweat equity?

Simpson clip for tying the sill plate to the rim joist

palm nailer allows the user to get nails into tight spaces

For me I think it is more like blood and sweat and tear equity. I’ve left a fair amount of blood and skin behind while inserting these little clips into very tight spaces. My engineer tells me that contractors generally open up part of the floor in order to attach some of the clips and brackets that are necessary to add for the seismic retrofit.


I bought this palm nailer in order to get the nails into the tight spaces that I was working in. It was worth it for me since I really didn’t want to remove any of the floor that I had put in myself a while back. We’ve had a few small earthquakes lately and the “big one” is due any day. As my engineer knows, I am very motivated to do this job right. There is a bit of comfort in knowing that an engineer has calculated the forces and designed the seismic additions.

Finally finishing the lower level

finally added the siding and new trim

I changed this lower level window from a large picture window to a smaller window that doesn’t interfere with the new stair placement. I matched the existing siding and built a custom redwood trim for the window. I’ve kept the original siding in a lot of the lower level and also repeated the original siding design at one place on the upper level. I want to remember and respect the history of this little house and the use of redwood siding is part of that history.

This house was built with older growth redwood before our better understanding of sustainability. My respect for those trees is shown by keeping it in place rather than tossing it in a dumpster. The patch shown here is actually pine from New Zealand. Of course there are issues with shipping the material so far but there is apparently enough of a market for it that it makes some sense. My contractor used redwood which is usually well controlled to be sustainable these days. When examining the new redwood compared to the older redwood, you can certainly see a big difference in the tightness of the rings and the weight of the wood and even the darkness of the color.

Moving up my old furniture and thinking up new furniture…

washing the clothes tower bun rack

In the process of moving my furniture upstairs, I realized there was an opportunity to do a thorough cleaning. My clothes tower is easy to move around for cleaning but there is nothing like pulling the drawers out and hosing it off.

This tower is going to be very useful in my new but still small bedroom. I’m rethinking my tower entertainment system though. I think I will leave the “tower of power” downstairs and create a new iMac based entertainment system for the upstairs. I’m thinking of a new lower, “loungey” system that still has power management and wheels of course.

September 2011 Update

The Contractor is Done

and now I have a lot of work to do :

I have new plumbing, new heating, new electrical and new stairs to design, build and install. You can see a window I am still working on in the photo above. I told my contractor that I wanted to do everything on the lower level. There was some crossover of work but I think the basic concept worked pretty well. Of course, since the contractor left the job, progress has been considerably slower. Some of my slow pace is due to my learning as I go but a lot of it is just the lack of time that I have to spend while working my regular day job.

My Contractor was great. He was really easy to work with and he allowed me to split the job up the way that I wanted. The work was very well done and managed very professionally. I am giving him an unsolicited recommendation here. Check out  www.eastwoodsf.com . His website helped me to decide on hiring him too. It seems that most contractors either don’t have a website or have something pretty primitive.

I’ve been hanging out a lot upstairs

Obviously I am very excited to be using the new upstairs. I am enjoying hanging out and sleeping upstairs and thinking about the future design for the space at the same time. I am thinking about the locations of heating ducts and plumbing and the bedroom closet.

upstairs shadows on the deck

I’m watching the shadows on the deck to design the deck surround panels. I want to block certain views for privacy while letting in the sun. I’m trying to figure out an angle for the panel boards to be at in order to allow in maximum sun. After hanging out at the deck for the sunset, I think I need to have some of the panels be glass in order to maintain an unobstructed view in certain places.


tiny bedroom in a tiny house

The new bedroom

Sleeping upstairs has been nice. Its great having a real bedroom. I’m still using the ladder to go up and down but it has been no problem. Just the concept of having an “up and down” is still novel to me. I am focusing on finishing structural reinforcement and getting the heating going. Basic necessities for the near future. Both earthquakes and the coming winter are sure bets.

Framing happens


Front view under construction

Construction begins amidst odd June rainstorms and neighbor unrest. I’m happy with the progress so far and two of my disgruntled neighbors are not so much.

my neighbor is unhappy with my construction

My neighbors expressed their concerns during the city council hearing and they continue to express their unhappiness. I realize that city council approval does not constitute neighbor approval but I would not have even have had to ask for any approval if my house was “standard” and “compliant.” Because my house is “sub-standard” I need to ask the city for a variance for everything that I do and that then triggers necessary neighbor review and they have a chance to plead their case to the review committee.

I have to be honest and say that I don’t really understand why they hate the idea of me adding my second story. I have designed this addition with the greatest concern for height and appropriateness to the neighborhood. I believe that the building commission and the planning department have recognized that in their full approval.

View of the back of the house

New framing shows the view from my new bathroom window

Meanwhile I am trying to breath through it and enjoy the fruition of my 3 years of work toward this goal.

Construction starts pretty early in the morning and I try to relax at night surrounded by the chaos of construction in a tiny house.

verb2 life during construction

My bed goes in the hallway during the day

Relaxation watching the office on Netflix surrounded by tarps and the general chaos of construction

A Calm in the Storm

a potted garden refuge for a tiny space

a potted garden refuge for a tiny space

During the Chaos, a Refuge

While the inside of my house is getting increasingly crammed with building materials and general chaos, I find myself looking for a refuge. It may seem odd to spend time fussing with plants during a construction project but this little oasis provides me with a lot of peace.

It is very meditative for me to spend an hour or so in the garden. These living things respond so well to a bit of attention.

Going Shopping

This is all the lumber needed for the lower level reinforcement

Went shopping today for the lumber needed for the lower level reinforcement. Doesn’t look like much and cost about $100. Rather heavy though and definitely tested the strength of my rack. Let’s just say the rack was sagging.

Reminds me of building my fence

just enough room for driving

8' lumber fit in my Geo....amazing

easy loading and easy access

I had a smaller car and no roof rack. It just goes to show you that you do not need a huge truck to get lumber home to your project.

I think even the lumber I just bought might have fit in my Geo but I’m not sure it would have handled very well on the way home……

Since you asked

Here is the way the the brackets are installed :

Hold Down for attaching stud to concrete foundation

This bracket attaches the bottom plate to the foundation

The engineer specified placement and size of the bracket.  The studs also have to be built up where it is attached.

Then the horizontal brackets shown below go in between where the vertical brackets are.