Miscellaneous Progress

Latest Photo

Here is an update. I posted this on facebook but I realize that not everyone uses facebook. This is the finished railing. Did some painting since this picture. Its raining today and I will work on some rough electrical.

Yup its raining in june…Just like it rained in July when my roof was opened up…


Finishing Stair Treads

applying clear coat finish to the treds

That is “finishing” as in applying a finish, not to imply that they are finished yet.

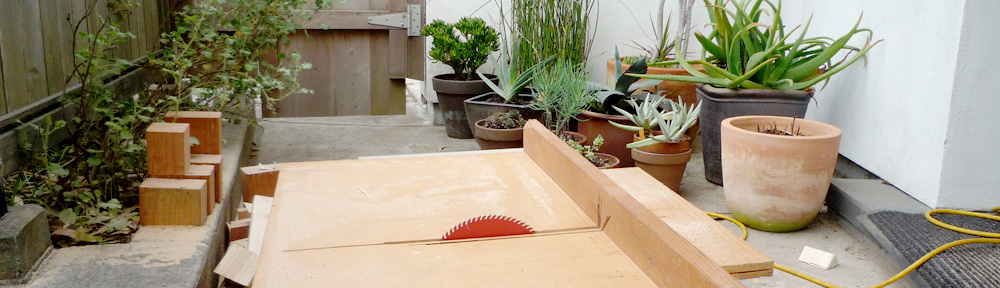
Since I don’t have much space inside I wait for nice weather to do finishing of the stair treads on my quiet dead-end street.

I hose off the street a bit to keep dust at a minimum. The finish is applied by a painting pad instead of a traditional brush. Its impossible to leave any brush strokes when you are using a pad and a roller can create texture and bubbles.

Here is the previous post with information on the stair tread material.

Getting Ready for the Wood Stove

tile area for the wood stove

I’ve actually bought the wood stove seen in my earlier post and it sits in the middle of my entry waiting for the stairs as the method for getting it’s 300 pounds of cast iron up to the second floor.

This image shows the tile work that is going to be underneath and behind the wood stove. In the foreground is a small piece of the oak flooring that will meet the tile floor.


The Railing for the Deck

deck view from the inside

I have finished enclosing the deck area with wood and glass. The wood railing design is very much as described earlier.

A rendering of my concept

I talked about this design in my earlier post entitled : “Details, details”


This new railing relates somewhat to the garden fence below. I used the same design techniques outlined in the process of creating that fence here : fence design


View from the Street

deck view from the street

The deck enclosure uses three different materials which may be considered taboo by some architectural aficionados. While I’ll be the first to admit that I tend to over think this stuff, there are practical reasons here. The stucco is a “fire wall” required by code due to the close distance to the property line.

The glass area was created to maintain the view that I was enjoying from the unfinished railing and the angled wood was a response to watching the sun set.

A Custom Glass Railing

aluminum and rubber design

I wasn’t able to find any “off-the-shelf” solutions to capture the tempered glass railing. I found the parts that I needed from two different sources.

I added rubber strip material to an aluminum “U” extrusion to create a way to capture the glass.

Aluminum is a beautiful material and can be worked with standard woodworking tools.

cutting aluminum

drilling and countersinking

extrusion attachment


The only difference working aluminum is that the sawdust sparkles.

aluminum sawdust

A Follow Up on Heating Registers

I was looking for registers in a previous post about “Life in the crawl space.” The register is the final frosting on the cake for all that nasty work down below. I found these bronze fixtures at a fairly reasonable price. The bigger they get, of course, the more they cost so I went with a less expensive register for my 12″ x 12″ Floor Return. I have to save money somewhere.


The Tub has Arrived

"onto" by duravit

But not the tub I originally wanted. My goal was to have a deep soaking tub that also functioned well as a shower. I thought I found that when I wrote the post about the Duravit “Seadream.” By the time I was ready to order it was out of production. The “Onto” is a beautiful and deep tub but it doesn’t have as much standing space as the other one did.

Now I just have to figure out how to install it ??

duravit installation guide


Status Report, September 2012

Where things are :

In the past people have asked me to clarify the locations of things so I hope that this illustration helps to show where things are on the second floor. This is also an opportunity to give a status update.

Layout of the new upstairs

  • The deck and the terrace are both going to have tile on them. The deck area tile is done but the railing around the deck needs to be finished. I posted a process picture of the tile deck on facebook  here.  The basic railing design I posted earlier on this blog here.  I am still tweaking the design a bit so it is slightly different than the illustration. There are different designs for varying transparency in different places. At the end of the deck  2 of the railing sections will be glass.
  • The arbor I made already and is ready for install when I am sure that it won’t get in the way of any other installation.
  • The stairs are in process. The metal frame is in place but I still need to level everything and make the final connections to the building. There will be plenty of work to do here. The engineer specified a beam under the floor where the stairs hit the lower level. The treds are wood and need to be cut and attached, then metal verticals are attached to each tred and those are topped with a solid wood handrail.
  • The bathroom and closet walls in the new bedroom have not been built yet. The entire bathroom has not been started yet. I want to wait until I get the new bathtub before I commit to exact placement of the bathroom wall.

I hope this helps to show where things are in relation to each other.

Details….details….

I’m working on a lot of different things at the same time. I’m figuring out how to do many of the things that I was unsure of; but then, it seems I often have to move on to something else due to the order that things need to get done. For instance, I figured out the railings for my decks but now I have to wait until I finish the tile. The railing was going to be in the way. I couldn’t run the large duct under the floor until I had the structural beam in place for the new stairway. Still working on that but the stairs are roughly in position.

Let there be heat

verb2 ducting

This is commitment !

I actually committed to the placement of the ducts. I’ve put large holes in the wall and the floor. All of the final ducting is not in yet but I am testing the furnace for heating and it is amazing what a difference a bit of heat makes to the comfort inside the house.  I’d say that “heat” makes a home more than anything else that I have experienced so far. This hole takes the duct underneath my house to be directed to separate spaces.


Big holes for big ducts


This hole goes from my garage into the living space and I had to consult with the engineer to see how big of a hole would be allowed to pierce through the structural shear wall. I had to reframe some of the wall around the hole. The 4×4 stair support is also right next to the opening. I don’t know if all houses are like this but a lot of stuff has to be coordinated together in a tight space.

See the heating layout concept here.

Railings for the decks

Railings are just getting started

I’m really excited for the new exterior spaces that I have created. I have designed the railing panels so that there are places where the sun can come through and there are also places that provide complete privacy. I hope to spend a lot of time on the deck shown in this picture. The other deck (or terrace) is on the left here. The terrace is mostly a place for plants and a bit of outdoor space right outside of my new bedroom.

Railing design

working out the details

I started watching the sun set over my new deck over the last several months. During certain months the sun will be coming right onto my deck and into my new living room. I wanted to take advantage of that. I didn’t, however, want to see or be seen by my neighbors. I developed an angle that I hope will allow for me to look out toward the ocean but will block my view to the neighbor’s house. Different sections of the railing will have different designs. Some designed for letting light through and others to block visibility as much as possible. I learned a lot from the first fence that I built for the ground level. I learned to base everything on stock lumber that I can easily get nearby. Look at fence design on verb2. The railing should relate to the fence below but the requirements are a little different.  Here is a rendering of the railing concept :

A rendering of my concept

A big step for mankind

Stair metal fabrication just arrived

I designed the new staircase to be similar to those old exterior stairs you see on ’70s and ’60s style apartment buildings. The exterior ones have concrete steps. I am going to use a wood construction material for the steps but I borrowed the idea of a single big steel center support.

I worked with a local steel fabricator that helped me to refine the details of construction. I like working with people that are able to have a conversation about process and design. He was very good at making suggestions and also still listening to my crazy ideas.

A little help…

It helps to have strong friends

The finished steel structure was pretty heavy. My friend told me that I had to post a picture of other people helping me because I give the impression that I do everything by myself. There was definitely no way that I could never get this structure in place by myself and it helps that my friends are tall and strong.